Customize registration
Once you have created your session, the next step is managing your registrations. Registration allows attendees to tell you ahead of time that they will be participating.
Enable registration
Registration helps you plan your session by letting you know ahead of time how many people will be participating. If you don't enable registration, you will not know how many attendees will be participating in your session. However, attendees who haven’t registered can still join your session if you send them a link.
To enable registration:
In the Registration tab, registration for a session will be enabled by default.
Customize registration:
You can customize the Registration form to include custom fields to capture more details about your participants.
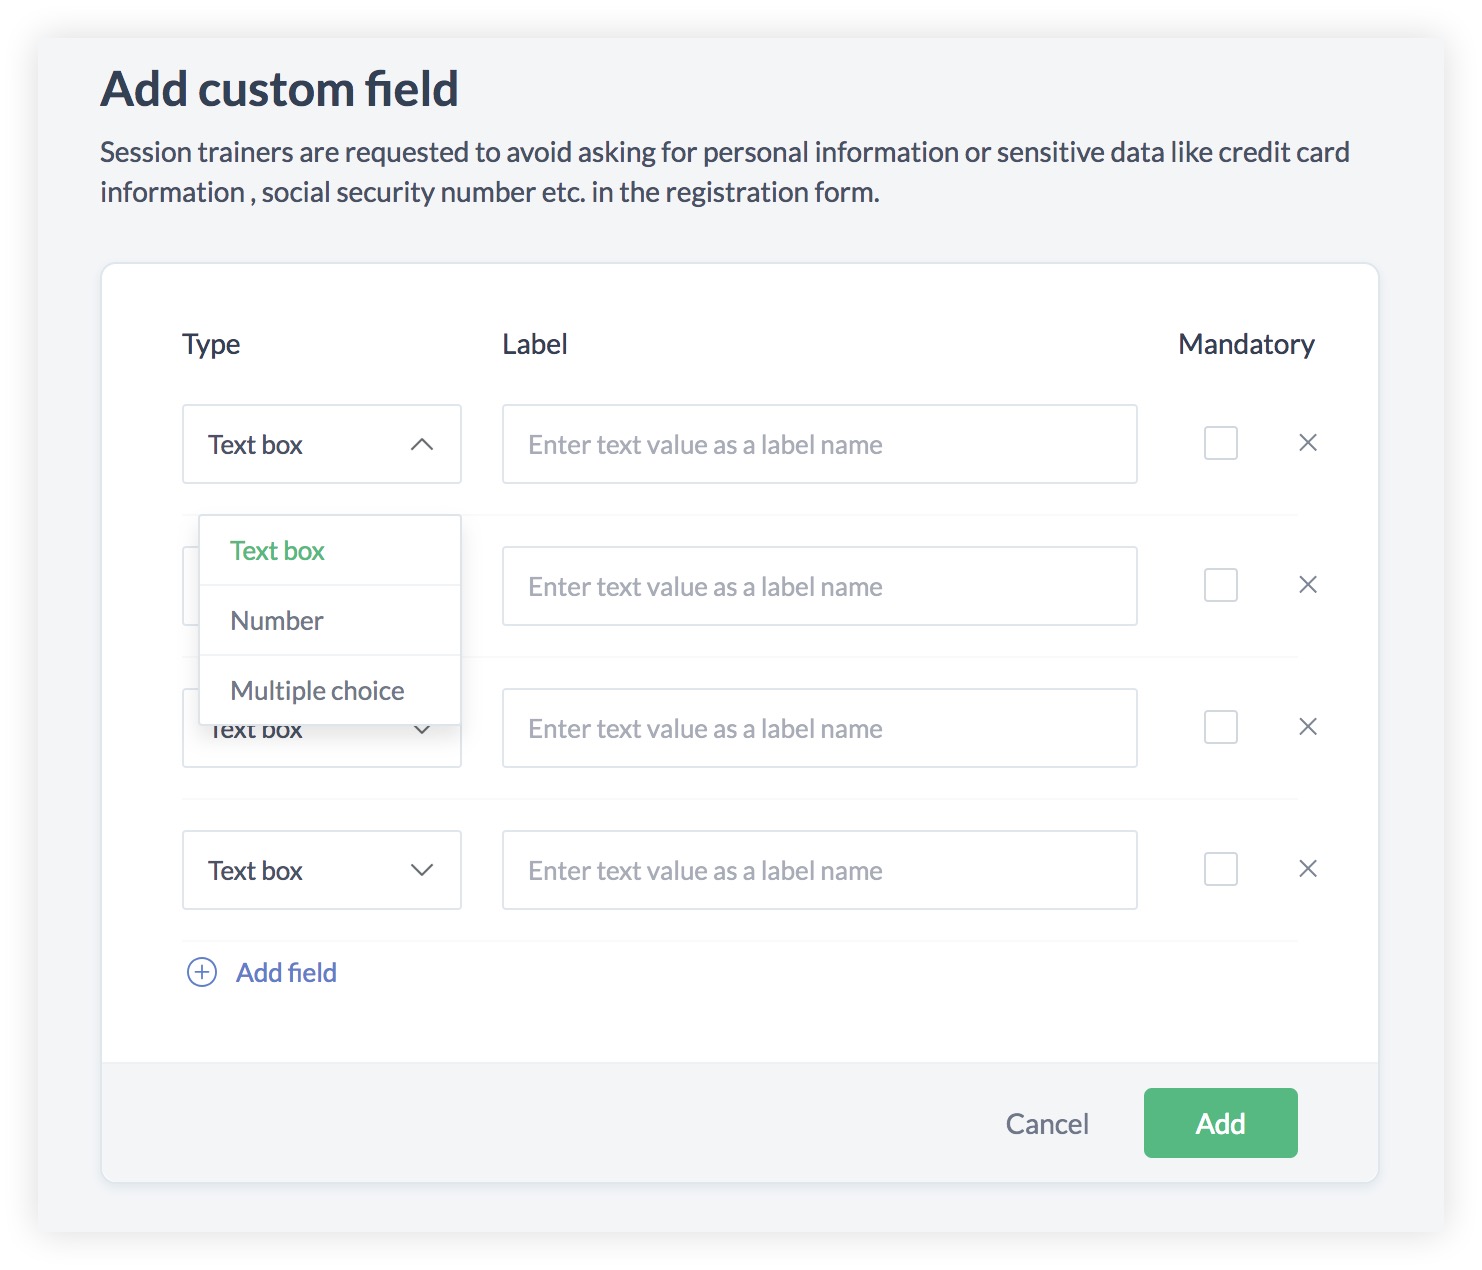
1. Click the Add custom field button.
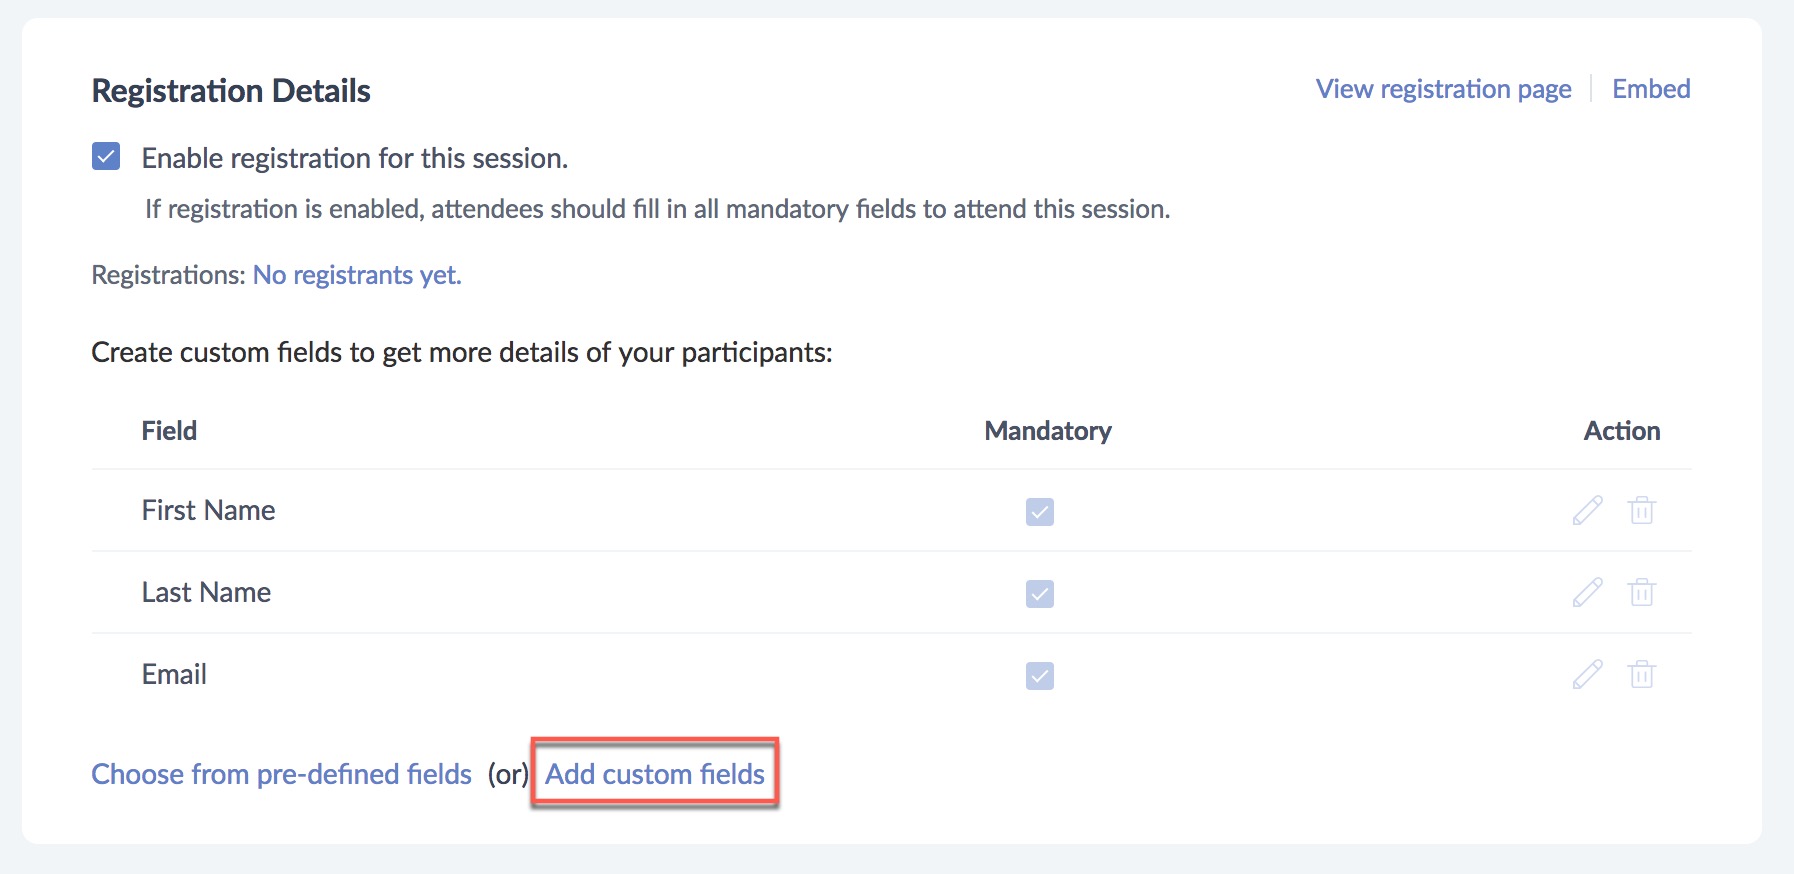
2. Specify a name for the field in the Label textbox and choose the type of data from the Type dropdown. (eg. Textbox, number, MCQ)
3. You can make the field compulsory using the Mandatory checkbox.
Add Pre-defined field
You can also choose to add the pre-defined fields offered by ShowTime by clicking on Choose from Pre-defined field. Once you select the fields, click Save.
Reorder the fields by hovering over the added fields and drag and drop them in any order that you wish.
Enable Privacy field:
In specific cases, you might want to declare the company's policies and practices with respect to the processing of personal data, It is also advisable to ask for consent from the participants regarding the usage of their information that they submit during registration. In such scenarios, you can use the privacy field to make sure that your audience are aware of the terms and adhere to these policies before entering your training session.
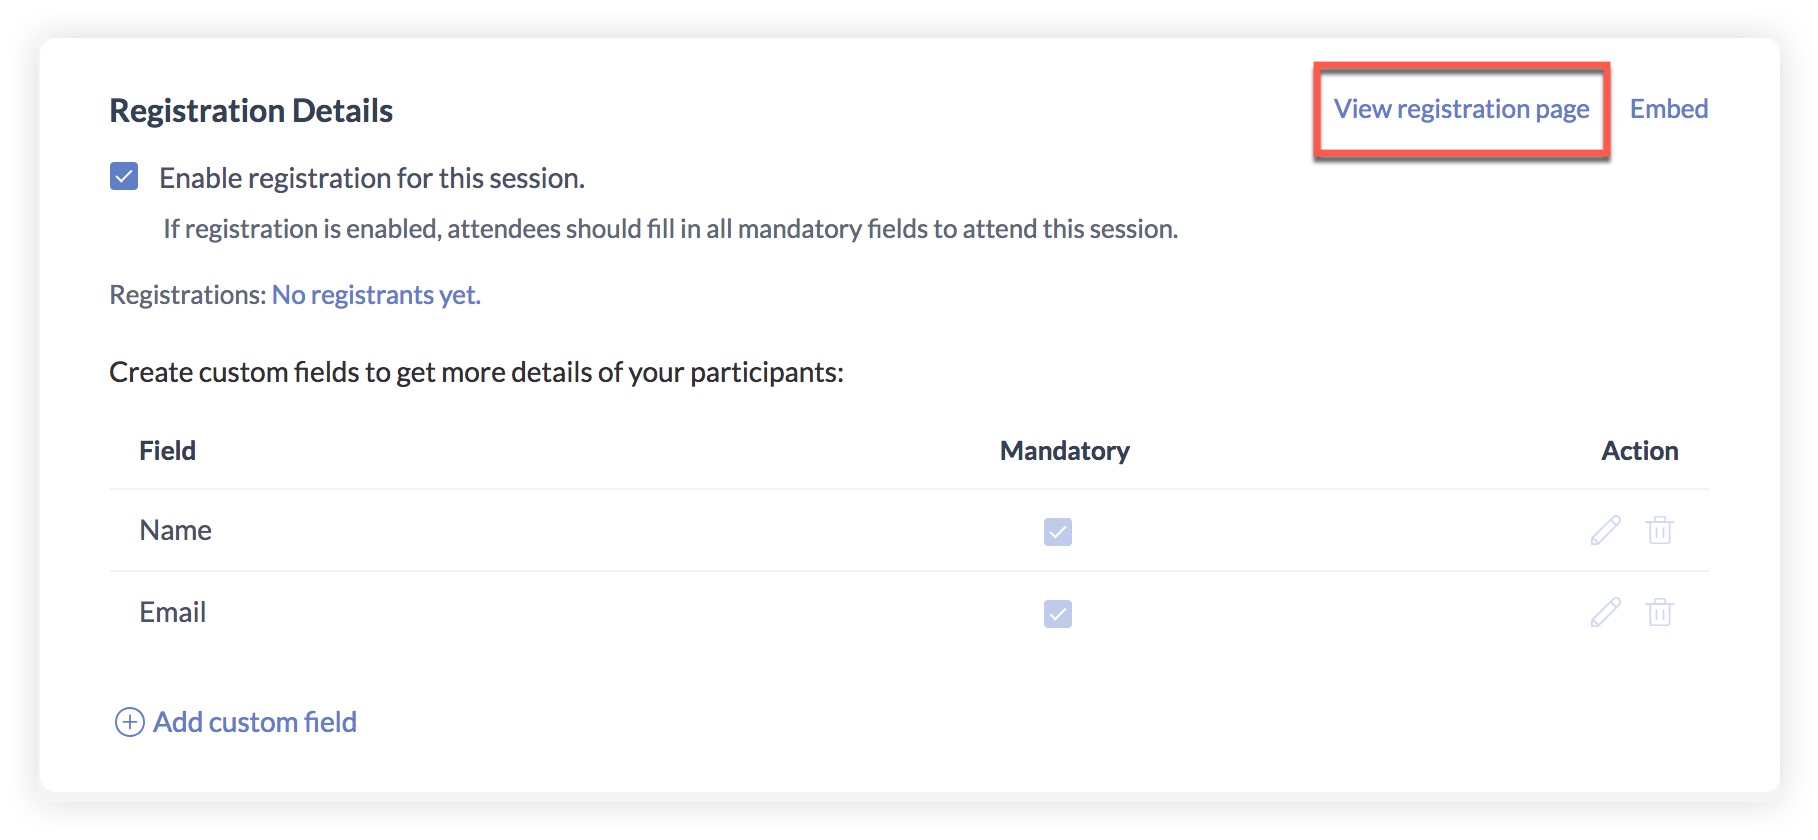
Preview registration form:
Preview the registration form by clicking on the View registration page button.
Embed registration form :
Embed the registration form in any of your digital platforms (eg. blog, organization webpage, etc) by clicking on the Embed button. This helps your trainees to register for your session directly from the embedded web page.
1. Specify a name for the web page (e.g. Facebook, blog, Zylker organization) in which you want your registration form to be shown in the Where will the link be shared? textbox.
2. Paste the iframe code in your preferred webpage. You can preview the registration form on the right pane.
The iframe that you paste in your site tracks the registration activity. For instance, when a user registers from your twitter post, it's tracked and logged as "Twitter". If a user registers from your blog, it's tracked as "Blog".
You can check the results of this tracking analysis under the Source column in the People tab.
Advanced Settings
Manage registrations :
Allow your registrants to join the session automatically - Every registrant will automatically be allowed to join your session. You don't need to approve the registrants individually.
Manually allow or deny access to each registrant to join your session - Every registrant needs your approval to access the session. They won't be able to access the session if you reject their registration.
Note: All the trainees you invite personally through the email, can join your session automatically. You cannot restrict their access once invited.
Where to redirect the registrants
You can promote your organization and build brand awareness amongst your prospects by redirecting them to any page of your choice.
Stay in the registration page. - The trainee stays in the registration page after completing registration.
Enter the redirect page URL - You can specify the URL of the page that your registrants will be redirected to, after they complete registration (e.g. blog or organization web page).
Your attendees can participate in a session by registering for it. If registration is not enabled they can instantly connect via the join link.
If the session has already launched, the attendees will be redirected to the Yet to Begin screen after registration. When the trainer begins presenting they will be able to view the presentation slides. If the session is scheduled for a later date and time, they will receive an email with the link to join the session on the scheduled date and time.
Make your trainings private:
Related Articles
How do I customize my invoice?
Go to Settings > More Settings > Templates and select the invoices tab. You can edit the predefined invoice templates by clicking on the Edit button that appears when you hover over them. You can also create a new invoice template by selecting ...Session Settings
Registrant Count You can put a limit on the number of registrants and the number of participants for your training session. Check the Customize registrant limit for this session check box and specify the value in the Enter registrant limit textbox. ...Setup On-Demand session
Create and deliver an On Demand training from ShowTime Web ShowTime Web allows you to train your audience with a recorded video/session that can be watched anytime. You can start a session either by uploading a video file or choosing one from the ...Promote your session
Embed Your Session: Click Embed Session in the Promote tab to promote the session on your website or blog. Specify a name for the web page (e.g. Facebook, blog, Zylker organization) in which you want your registration form to be shown in the Where ...How to enable price lists?
With price list, you can customize rates for items in a sales order or all items sold to a particular contact. To enable the price list feature: Go to Settings > Preferences > Items. Check the option Enable Price Lists and save. You can now create a ...